I am not an especially “crafty mama”, but I can follow simple instructions. Recently, Bianca from ScribbleShop.com, a new online resource for purchasing arts and crafts supplies at competitive prices, reached out to me to see if we could work together on something. Since readers are often seeking different activities to engage with their kids when they visit this site, I suggested that she send over an easy to follow family craft. (In addition to selling supplies, ScribbleShop.com also offers craft inspiration, tutorials, printable worksheets and coloring pages.) I must admit that I was impressed when she came back with an edible activity. If you have any beach themed outings or parties planned, then you will definitely want to bookmark this post. Enjoy!
_________________________
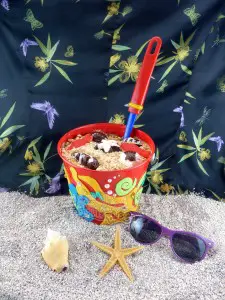
Are you looking for a summer treat that is fun to make and offers a great presentation? Then try our Beach Cake! Made with layers of yummy Nilla Wafers, Vanilla and Lemon Pudding and cake, this treat is sure to offer a fun surprise to any summer event!
This dessert is great for parties, super tasty and the kids will love to help decorate the pail and make the cake and eat it too!
To make the decorative pail, you will need:
– A Tin Pail
– Colorful Felt
– Rhinestones
– Pearl Stickers
– Tacky Glue
For the cake, you will need:
– 1 box of Vanilla Instant Pudding
– 1 box of Lemon Instant Pudding*
– ½ a box of Nilla Wafers
– 1 box of your favorite vanilla cake mix
– 1 snack size bag of Swedish Fish
– Chocolate Melts in White and Chocolate
– Candy Molds in Seashell Shapes
* You can use 1 box of each flavor, or 2 boxes of one of the flavors
(You can purchase all of the creative supplies here at Scribbleshop.com!)
To start, first clean the inside and outside of the pail.
Get creative with the felt and cut out underwater shapes- coral, fish, starfish, etc.
Glue on the shapes using Tacky Glue.
Add additional embellishments with rhinestones and pearl stickers.
Allow glue to dry for a few hours or overnight.
For the cake: (This is where things get fun!)
Prepare your ingredients
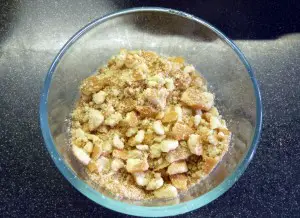
Mash up the Nilla Wafers in a bowl. You want it mashed up to look like sand, but in a separate bowl, mash a few chunkier pieces. You will need to use about half a box to make the Nilla Wafer “sand”.
Make the Instant Pudding (and try not to eat it yet).
Mix up and bake the cake in a 9 x 11” pan. You will only use about half the cake.
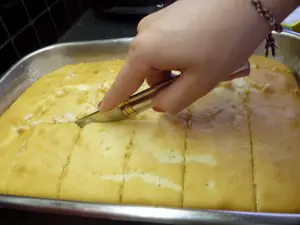
Once the cake is cooled, slice it up into 1 x 2” cubes.
Place a thin layer of mashed wafers into the bottom of the pail. Mix up the “sand” piece with the chunks.
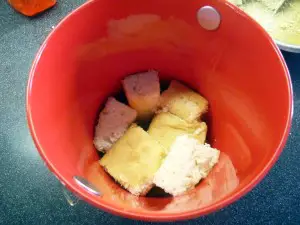
On top of the sand layer, place one layer of cake-cubes.
Cover these two layers with a thick layer of pudding. (It’s your choice regarding which flavor to use first).
Again, layer with “sand” and then cake.
Cover these layers with the other flavor of pudding.
Repeat these steps as necessary. The last layer at the brim of the pail should be pudding. If you fall a little short, it’s okay to add a little extra pudding.
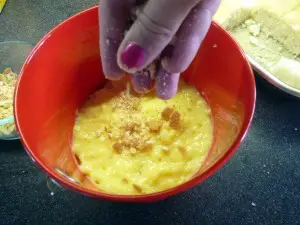
Once you’ve laid the last layer of pudding, completely cover this layer with the fine-mashed, “sand”–like wafers…no chunks this time.
Place your cake into the fridge for at least 1 hour.
While the cake is in the fridge, make the chocolate shells.
Melt each of the chocolate flavors/colors in separate bowls. It is best to do this at 15-second intervals. Remove the bowl from the microwave, stir and place in the microwave until the chocolate runs smooth.
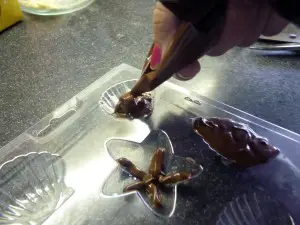
Pour melted chocolate into a plastic pastry bag (or a Ziploc bag and snip the end of one corner).
Repeat these steps for each of the chocolates colors.
Using the Pastry bag, fill the candy molds to make your shells.
You can make solid colored shells, but if you would like to make decorative shells, here are a few tips:
- Fill only parts of the mold with one color and add another layer on top to fill the mold to fill the specific designs of the mold.
- Sprinkle lines of one color into the mold going straight across from left to write. Completely fill the mold with another color. Using a toothpick, drag lines into the mold going from top to bottom. This will gently blend the colors to make a unique tapered design.
Once all the molds are filled, place the molds into the fridge for at least 30 minutes. After the 30 minutes have passed, remove the molds from the fridge, turn the candy mold upside down over a plate and very gently twist and bend the mold. The shell candy pieces will simply pop out onto the plate.
When you are ready for your dessert, remove the cake from the fridge and put a sand shovel into the top of the cake. Decorate the top of the cake with the chocolate shells and Swedish Fish. Present your cake and enjoy!
If you like this post, please consider…
-Following Mom in the City on Twitter
-Liking Mom in the City on Facebook
-Signing up for Mom in the City’s FREE weekly email newsletter
